Scanifly Software Review
- The Scanifly drone-based designing software for roofing installations was developed in 2015. During the last 5 years, the company transformed into a top-ranking corporation with a wide range of options for renewable sector energy and the construction industry. In 2018, Scanifly became commercialized and launched drone services.

Drone services by Scanifly are complemented with comprehensive shading analysis and automated export of CAD reports. This software is used by designers, surveyors, and executives. In 2020, Scanifly added sales tools to the functionality.
In May 2019 the Scanifly team was rewarded with the annual prize for successful startups. The Midwest Solar EXPO experts named the Scanifly software as the startup pitch competition winner. Let’s take a closer look at the drone-based 3D modeling software that can streamline the solar development workflow.
Project Creation
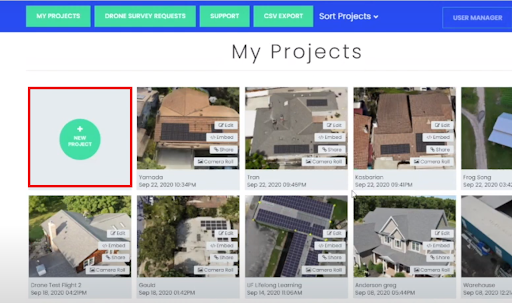
Having bought the Scanifly subscription, the user can create a new project. There is no limitation for projects. All the designs and reports are saved in the software. There is a top panel with action buttons for faster navigation. Additionally, there is an opportunity to sort projects according to different parameters.
To start working with a new project, the user should specify the main information. It is available to enter project data in the first section. To have access to various designing solutions and make calculations, measurements, and other settings more accurate, there is an option of drone survey images.
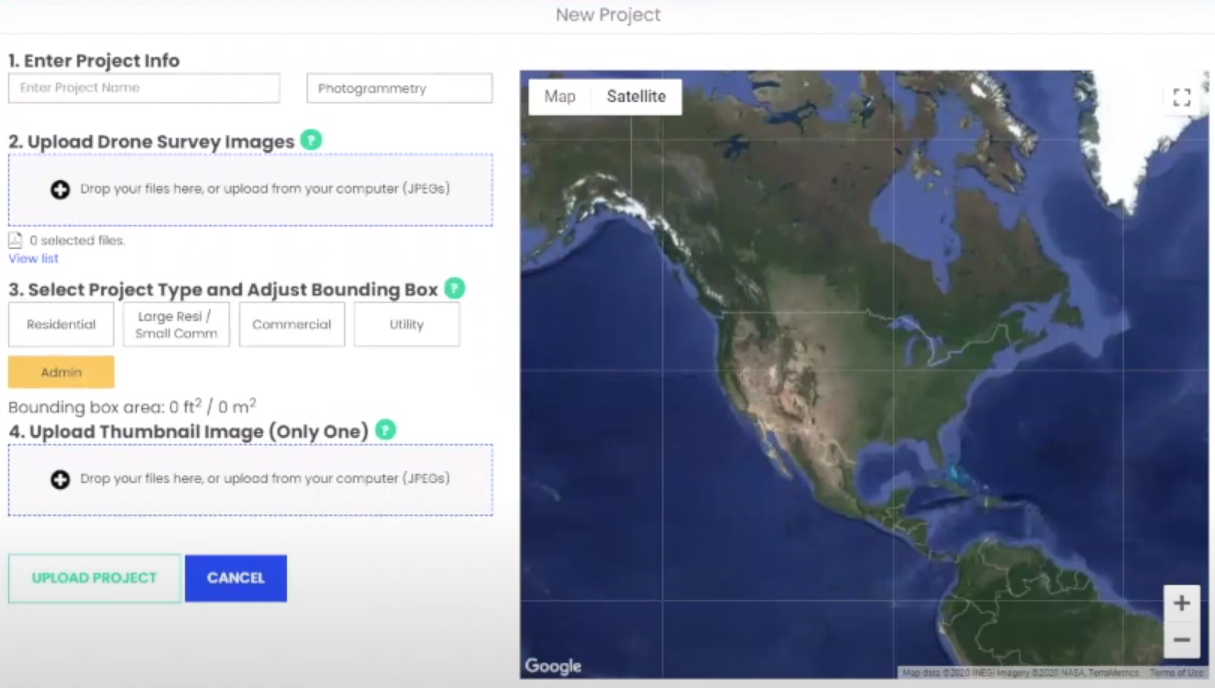
While creating a project, the user can select a project type, adjust the bounding box, and upload a thumbnail image. It is worth noting that only one thumbnail picture is allowed. When the main information on the project is specified, it is possible to start 3D modeling and other stages of the solar power designing process.
Drone Services & 3D Modeling
The surface is surveyed by the drone facilities. Drones take pictures of the site. Then, the user should upload drone-captured imagery to the project. The next step is 3D modeling. Almost all the settings are offered in the menu. The user should specify all the required parameters for design and analysis:
- Layers and sectors (dimensions, obstructions, keep-outs, adjustments, etc.);
- Segments (additional segments can be placed with the help of the Add action button);
- Shading parameters.
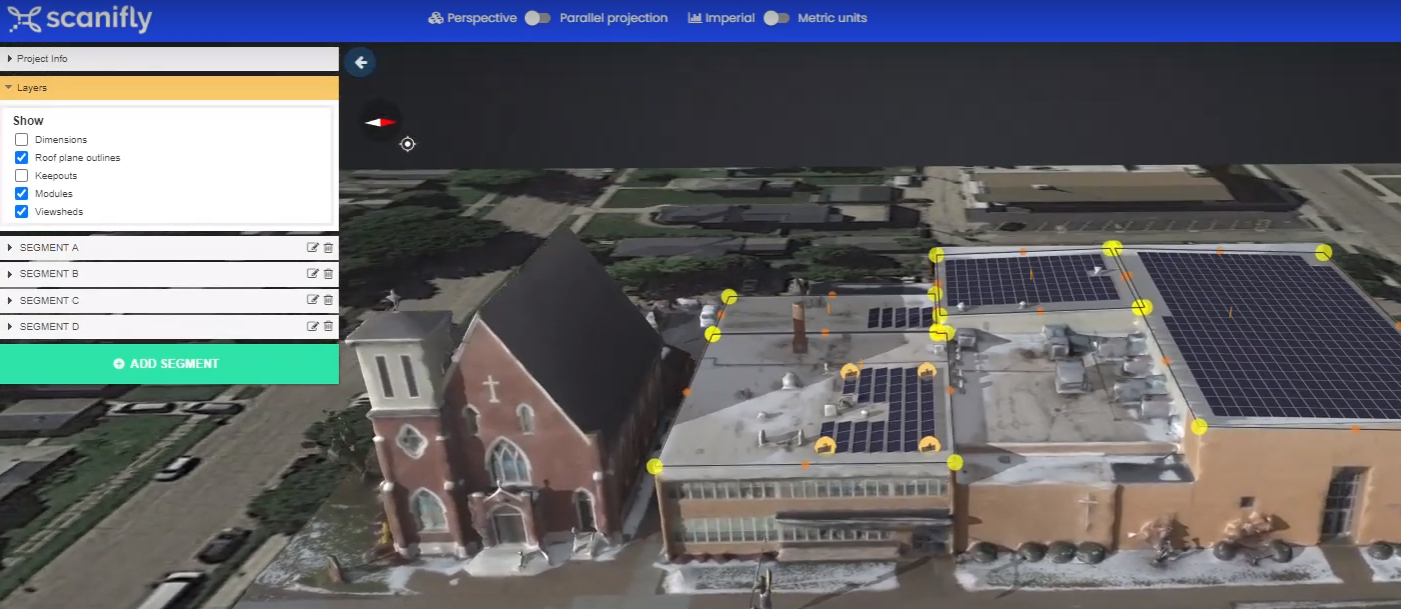
Speaking about shading analysis, it is worth noting that the Scanifly software takes into consideration changes of shades for each hour. It makes calculations and the designing process error-free and accurate. All the settings are available in the Shade Tool section.

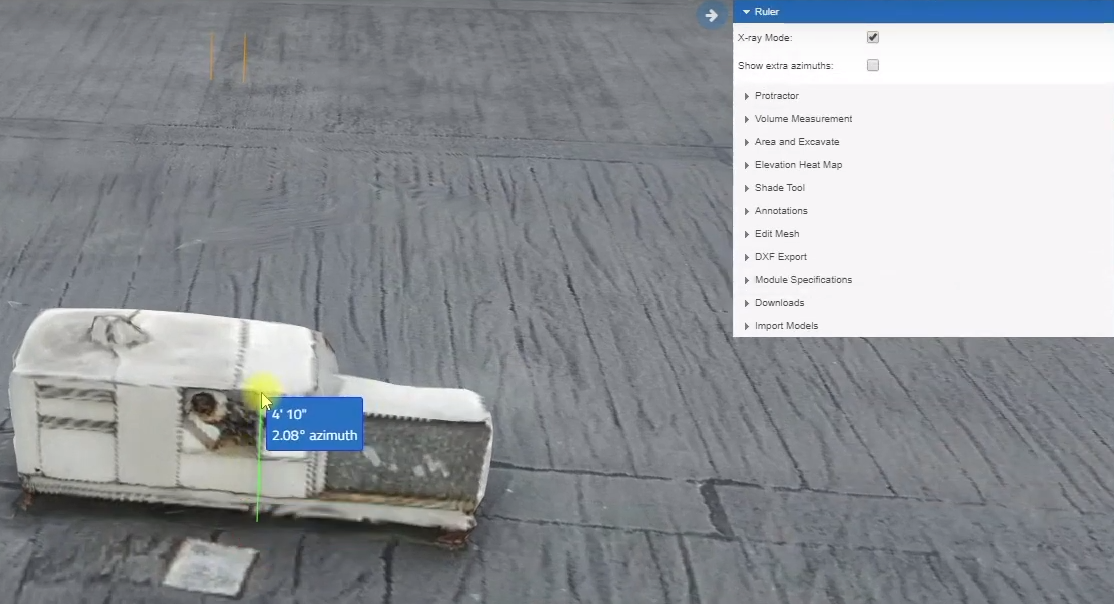
For keep-outs, obstructions, and other roof-based objects, there are XYZ settings to specify all necessary physical dimensions and specifications. The user can select necessary azimuths, sizes, lengths, and heights.
A full list of parameters can be opened by the user. Each section is hidden and can be shown after its selection with the computer mouse. There is a menu of Modules with detailed specifications and options that can be undertaken automatically.
One more additional feature for 3D modeling is an opportunity to add the object to the project that is not caught by the drone. For example, a tree or a residential addition. The user inserts the 3D model into the project. A new object is taken into account for shading analysis and reporting on energy consumption and production.

The 3D model can be moved and turned around according to the requirements of the user. Designers can zoom these objects and change their dimensions to make the project with the site ready for exporting.
Exporting & Reports
The project is exported in the form of CAD files. There is an opportunity to create shading reports or export project imagery only. The user selects the type of reporting and exports all necessary data related to the solar power system design.

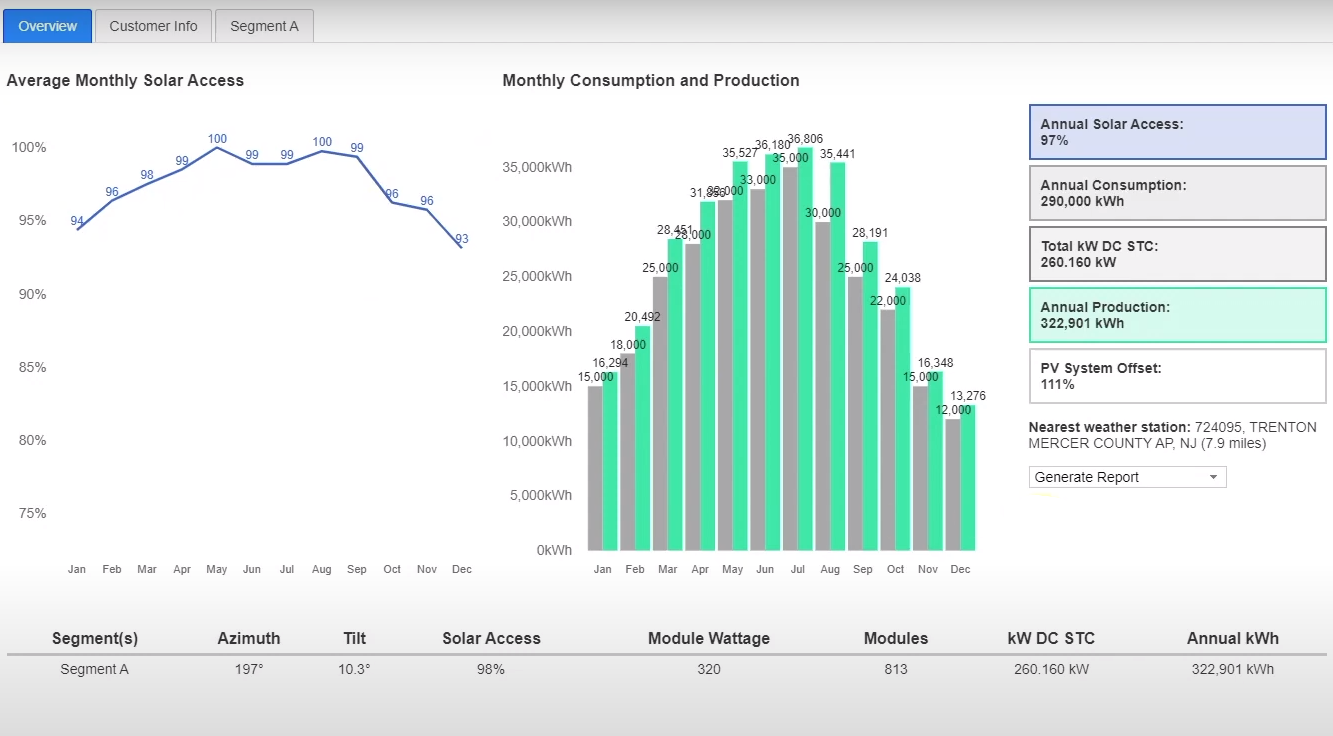
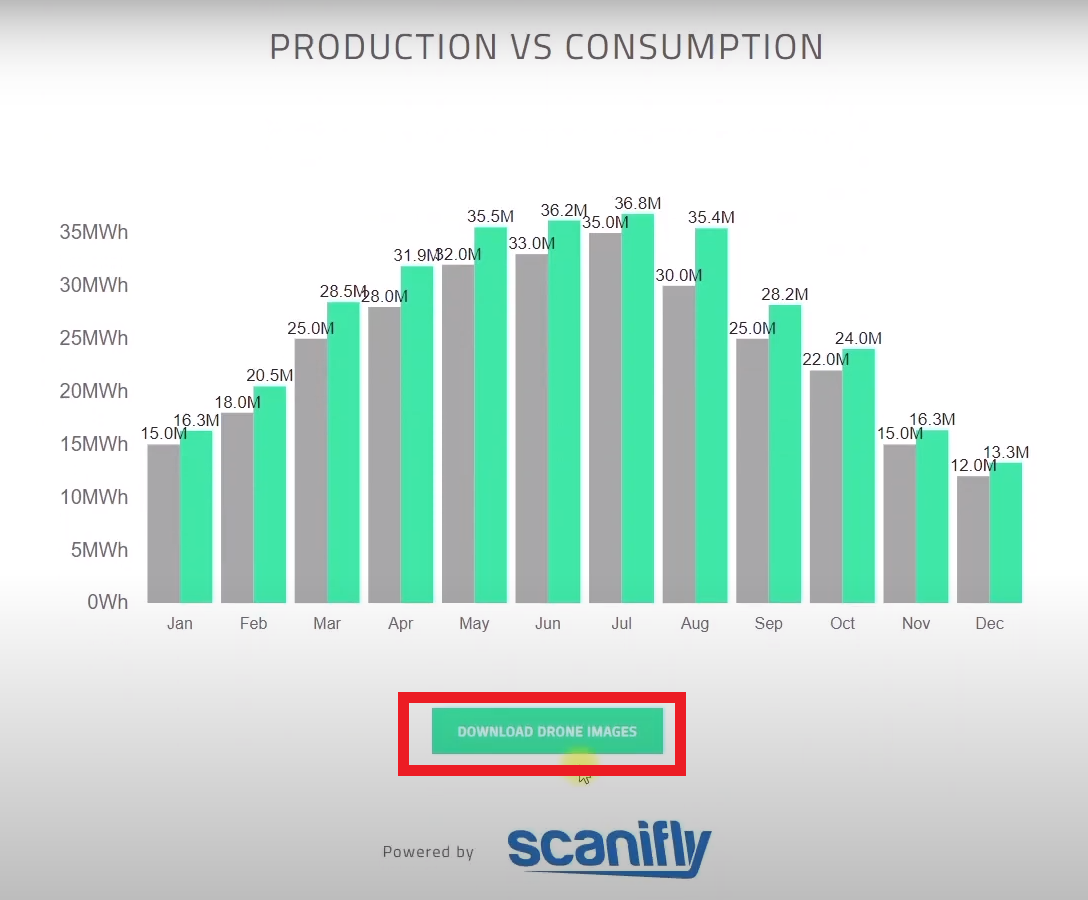
The graphical report is created with the help of the XYZ settings. The picture with modules and site specifications can be moved according to the specified parameters. The site report is created according to the shading analysis as well. The report on shades includes solar access that can be measured each hour according to the individual shading parameters and seasonal conditions.
The energy report contains graphics and infographics on the average monthly solar access, consumption, and production of renewable energy per month. The table with the percentage and additional information for the current project is presented next to the diagrams.
Each project has its own shareable link. The user can download reports in the personal Scanifly account.
The Final Word: Scanifly Pros and Cons
Drone-based solutions made calculations and reporting more accurate in comparison with satellite imagery. The Scanifly drone-based solutions are the essential ones for this solar software. To sum up, let’s take a closer look at the Scanifly strong and weak sides:
Pros:
- Automated drone-based simulation
- Shareable report links
- Downloadable drone-created imagery
- Accurate measurements
- Comprehensive hourly shading analysis
- Embedment of 3D objects
Cons:
- The price depends on the size of the project (up to $500 for large-scale projects)
- The free demo is requested only (is not guaranteed)
- There are no electrical schemes and reports
- Limited designing options for modules
Also Read: